Hello everyone,
I hope you are taking the time to go out there whenever the sun peeks its warm little self out and catch some lovely warm rays. I have! And as I stroll along the perimeter of my garden, Ive been pulling out a few weeds here and there and admiring the new blooms on my peach tree.
She's a beauty this time of the year!
She inspired me to pull out the Garden stencil by Kaisercraft from the Making Daisy Chains September 2018 Kit and play!
See what I mean!!!
But I'm jumping ahead of myself!
This is the stencil I'm talking about.
I gathered some heavy weight water color paper and Distress Inks and Oxides in my craft room and sat down one warm afternoon and enjoyed myself thoroughly.

I have 4 stenciling techniques I wanted to share with you.
My card front panels are cut to 4.25" x 5.5".
Stenciling Technique #1 - Basic 2 Tone Stenciling
In this technique, I coloured in the flowers and the greens separately with 2 different colors to achieve a very controlled look.
I added the lighter color all over each area first then went in with the darker color in some areas to give a deeper more dimensional look.
For the petals I used: Victorian Velvet and Dusty Concord
For the greenery I used: Mowed Lawn and Evergreen Bough
I love the fresh look the white background gives this panel.
I can just imagine red flowers, yellow flowers, purple flowers - the colours are endless!
Stenciling Technique #2 - Background plus 2 Tone Stenciling
In this technique, I used Fossilized Amber to sponge the background first.
I went heavy around the outside and left the inside white.
Then I added Victorian Velvet to the inside.
I then applied the stencil and used Abandoned Coral to touch the centres of the petals and a quick stroke towards the outside but not completely.
I added a combination of Mowed Lawn and Evergreen Bough to the green.
I love how different a colored background makes the panel look.
And once again here, the color combination are endless!!
Stenciling Technique #3 - Reverse Stenciling
For this technique, I picked up Faded Jeans in the Distress Oxide and dabbed it onto the entire card front.
Next, I positioned the stencil and using a baby wipe, I removed the distress oxide through the stencil so when the stencil is removed ...
the negative pattern is achieved.
I LOVE how simple yet so effective this is.
I repeated the same technique with Peacock Feathers.
Such a lovely color.
Stenciling Technique #4 - Bump Technique
For this technique, I once again applied color to the background of the card front and then stenciled in the 'garden design' using Black Soot Distress Ink.
Next, I re-orientated the stencil to it's previous position and then ever so slightly bumped it to the side about 1/8". I then applied white acrylic paint with a dauber.
It produced the most beautiful design.
This technique was taught by Lynne Perella for Paper Artsy. I first heard about it HERE
Stenciling Technique #5 - Double Bump Technique
This technique is the same as the one above except I double bumped!
So first I stenciled with Wild Honey Distress Oxide (after doing a horrible job of adding Black Soot to the background and then trying to remove some of the pattern through the stencil - check out the video, it will explain it better)
I bumped the stencil over to one side to stencil once again with Abandoned Coral Distress Oxide
then I bumped the stencil over to the other side to stencil in the white acrylic paint.
The result is wonderful!!

If you look closely, you can see both yellow and pink radiating from the flower plus the chalky white of the paint makes it look very folk-art-ey.
I love the effect!!
Here is a look at all the panels I made.
From here, you can choose to make tags, make cards or go one step further!
I chose to turn these into Spring Booklets.
To make the booklets, I cut down Kraft card stock to 6" x 9" - scored @4.5"
I attached the panel to the front using double sided sticky tape.
I chose to cover the inside of one paper with G45 paper while the other I left Kraft color.
Next I added ribbon to the spine of the booklets and sent them for a quick stitch through my sewing machine.
For added texture, I added lace to the inside of the front cover so that it could also be seen peeking out from the front.
Next, I added die-cuts from black card stock using Sizzix Thinlet Dies - Wildflowers.
I then grabbed my Paper Doll ephemera Pack (also by Tim Holtz) and added a few focal images to each booklet.
Lastly, I wanted to made a hand made embellishment which I could attach the sentiment to.
I made this simple fish tail banner with Kraft card stock and a tooth pick and layered it up with hessian and lace.
Here are the complete decorated booklets :
For this booklet, I added a charm from the Crate Paper Metal Resin Charm pack from the September Kit by threading it through some cord and stapling it onto the hessian.
I love the vintage spring feel of these booklets.
I made a total of 5 (because I enjoy this kind of thing).

You can catch how I made these booklets in the process video on my YT channel HERE
I also went ahead and made as well as decorated the inserts that go into these booklets.
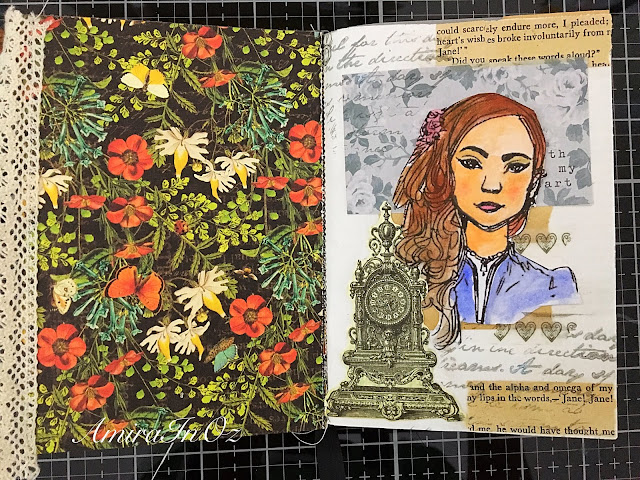
Here are a few double page layouts.
You can find the process video for insert making and decorating HERE.
I hope you give these stencilling techniques a go.
Happy crafting
xx Amira


Comments
Post a Comment