Hello everyone,
This month, I challenged myself to make cards using the Echo Park "Under the Sea" paper collection. My first impressions of this collection were that they were too bright and too busy to work with.
I wanted to conquer that inner ' negative Nancy' that creeps her ugly head every once in a while- so I took on the challenge.
Card 1: Enjoy the breezes
For this card, I used the fish side of the paper "Aquatic Fun".

Firstly, I cut a panel that was 4" x 5.5" and added it to my card front.
Next, I cut another panel of white card stock that was 3.5" x 5" and I used my rectangle die to cut the middle out and adhered it to the background paper with foam tape.

Next, I used this stamp set from my stash and stamped out the seaweed plants and coloured them with with my pro markers and adhered them to the bottom of the white panel to add more elements to my card.

I love getting new crafty items and pairing them with other crafty items from my stash!

Next, I used seahorse from the cut apart sheet "Journaling Cards" and fussy cut him out to be the main focal image of my card.

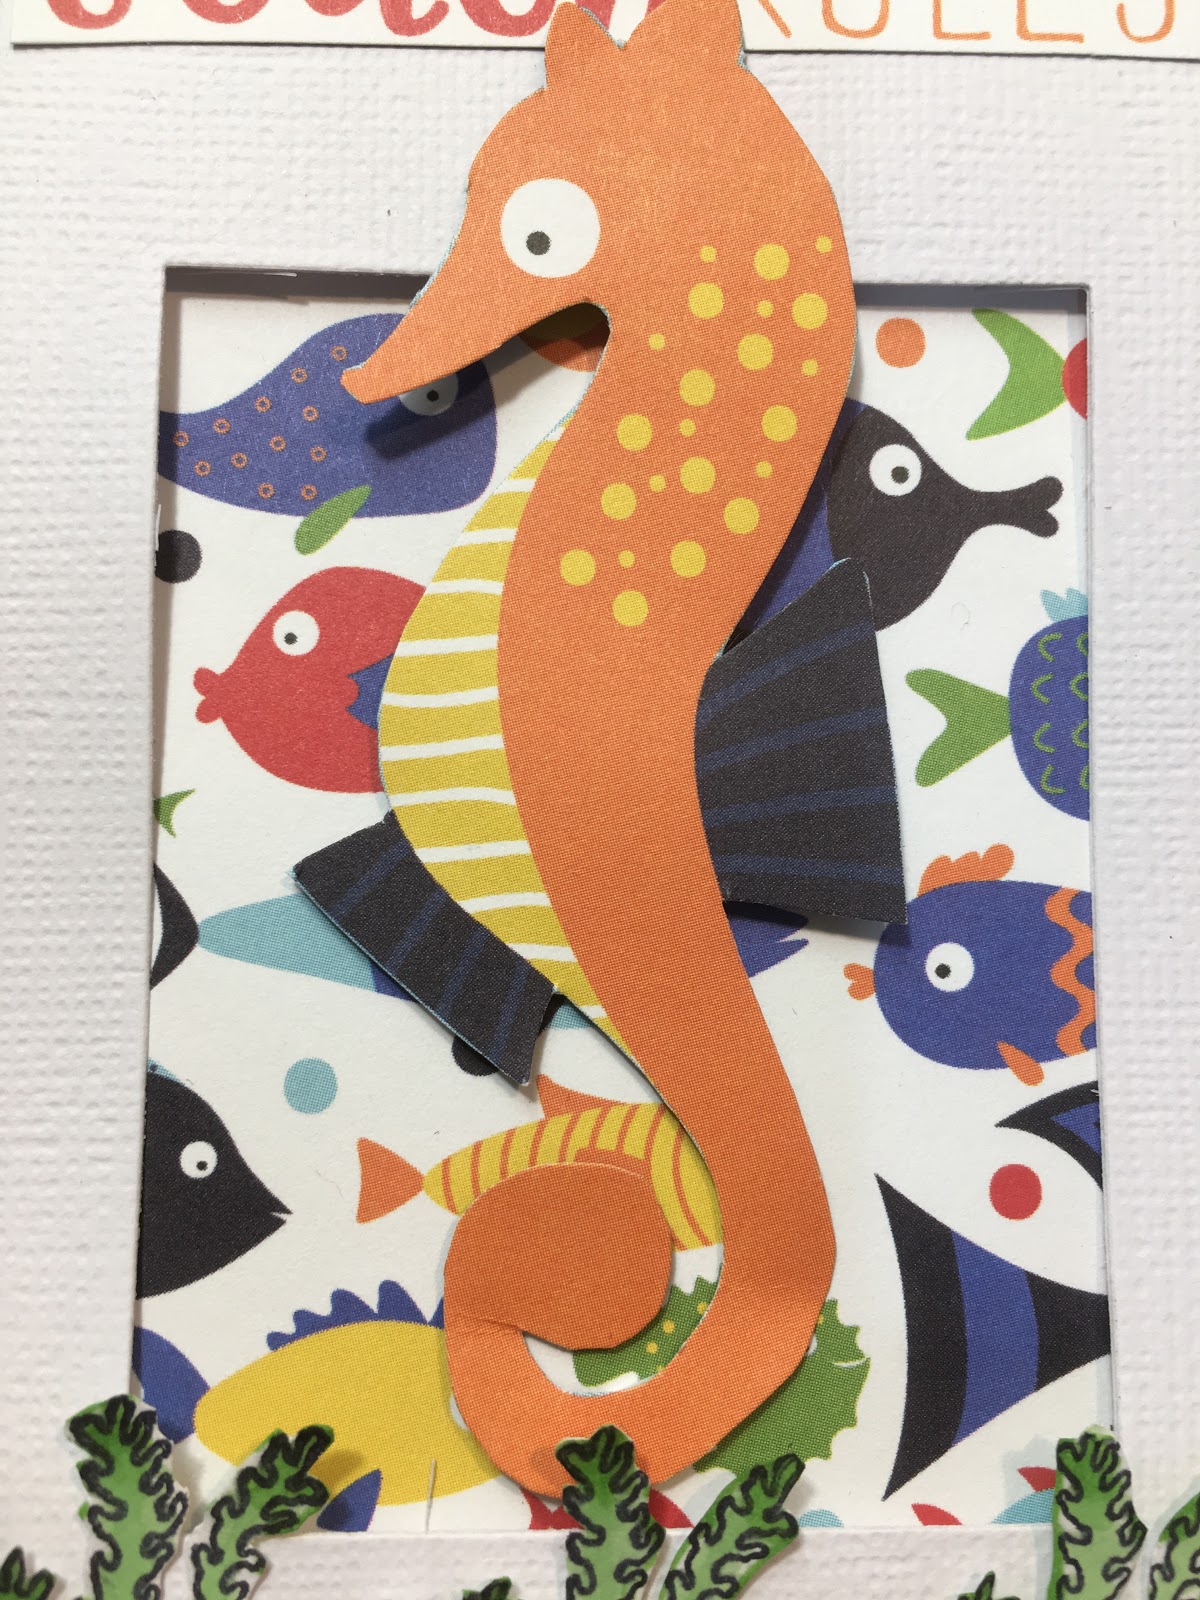
I also used the cut apart next to the sea horse to make the sentiment in this card which I added a thin strip to at the top and the bottom of the card.
And that's my first card done :)

Card 2: Lets make waves
For my second card, I used a combination of these 2 papers:
I matter my card front with deep blue card stock and then cut the fish paper to 2" x 3.75" and the bottom blue paper to 3.75" x 3.25".
Next, I made my gold fish by stamping her out twice- once on card stock and once on the beautiful Mermaid Scales washi tape from the kit.

For my second card, I used a combination of these 2 papers:
 |
| Border Strips |
 |
Submarine Scene
|
Next, I made my gold fish by stamping her out twice- once on card stock and once on the beautiful Mermaid Scales washi tape from the kit.

To see how I made this fish, please check out my process video HERE.
I fussed around with the cut apart sheet finally deciding on this one here and I think it is a better choice as I love the blue colors in this card with the pop of red from those fish.
The theme of this card was along the lines of when everyone is going one way, you make sure you are still doing your own thing even when it feels you are going against every else- Just Keep Swimming ! Believe in yourself :)

Card 3:Make a splash
For the next card, I used this pretty patterned paper.
I cut out a panel that was 4" x 5.5".
I also cut out 2 smaller orange panels 1"x 5" and put them on either edge.
I used my circle die to cut a larger circle using the 'Sea Explorers' paper and then used a smaller circle die to cut out the "Nemo" paper from Border Strips.
I used a Kaisercraft anchor die from my stash and cut it out of thick silver card stock.
And I stamped out a sentiment that said "Make a Splash" which is what an anchor would do if you throw it off the side of a boat :)


For the next card, I used this pretty patterned paper.
 |
| Deep Sea Fun |
I cut out a panel that was 4" x 5.5".
I also cut out 2 smaller orange panels 1"x 5" and put them on either edge.
I used my circle die to cut a larger circle using the 'Sea Explorers' paper and then used a smaller circle die to cut out the "Nemo" paper from Border Strips.
I used a Kaisercraft anchor die from my stash and cut it out of thick silver card stock.
And I stamped out a sentiment that said "Make a Splash" which is what an anchor would do if you throw it off the side of a boat :)

At this stage, I thought the card was missing a focal feature...

.. so I created this seaweed patch out of a stamp I had and then added seed beads to simulate the seaweed bulbs.
I then cut out a clown fish and attached him to the seaweed.

I love how it turned out!
When the anchor got thrown in, 'Nemo' ran for the seaweed patch LOL!!

Card 4: Enjoy every day
This next card uses the horizontal 'Journaling Cards' cut apart sheet.

This next card uses the horizontal 'Journaling Cards' cut apart sheet.

And it also features the mini Gorjuss 'Awashed' stamp set from my stash, which I coloured in with my Prima water color paints.

I fussy cut her out and added her to some light blue patterned paper (matted with black card stock) and added her to the horizontal journaling card.
I then added the heshian which is just PERFECT as it looks like a sailor threw his net into the waters and anded himself a mermaid.

One extra thing that was definitely required was to add some glitter to her scales and her hair! Its all in the little details!


She's SO gorgeous!
Card 5: Don't be crabby
The next card featured this crabby paper ;)


The next card featured this crabby paper ;)

I also paired it with the "Don't be crabby" journalling card which was perfect!
And I sandwiched the hessian in between the two for extra texture.
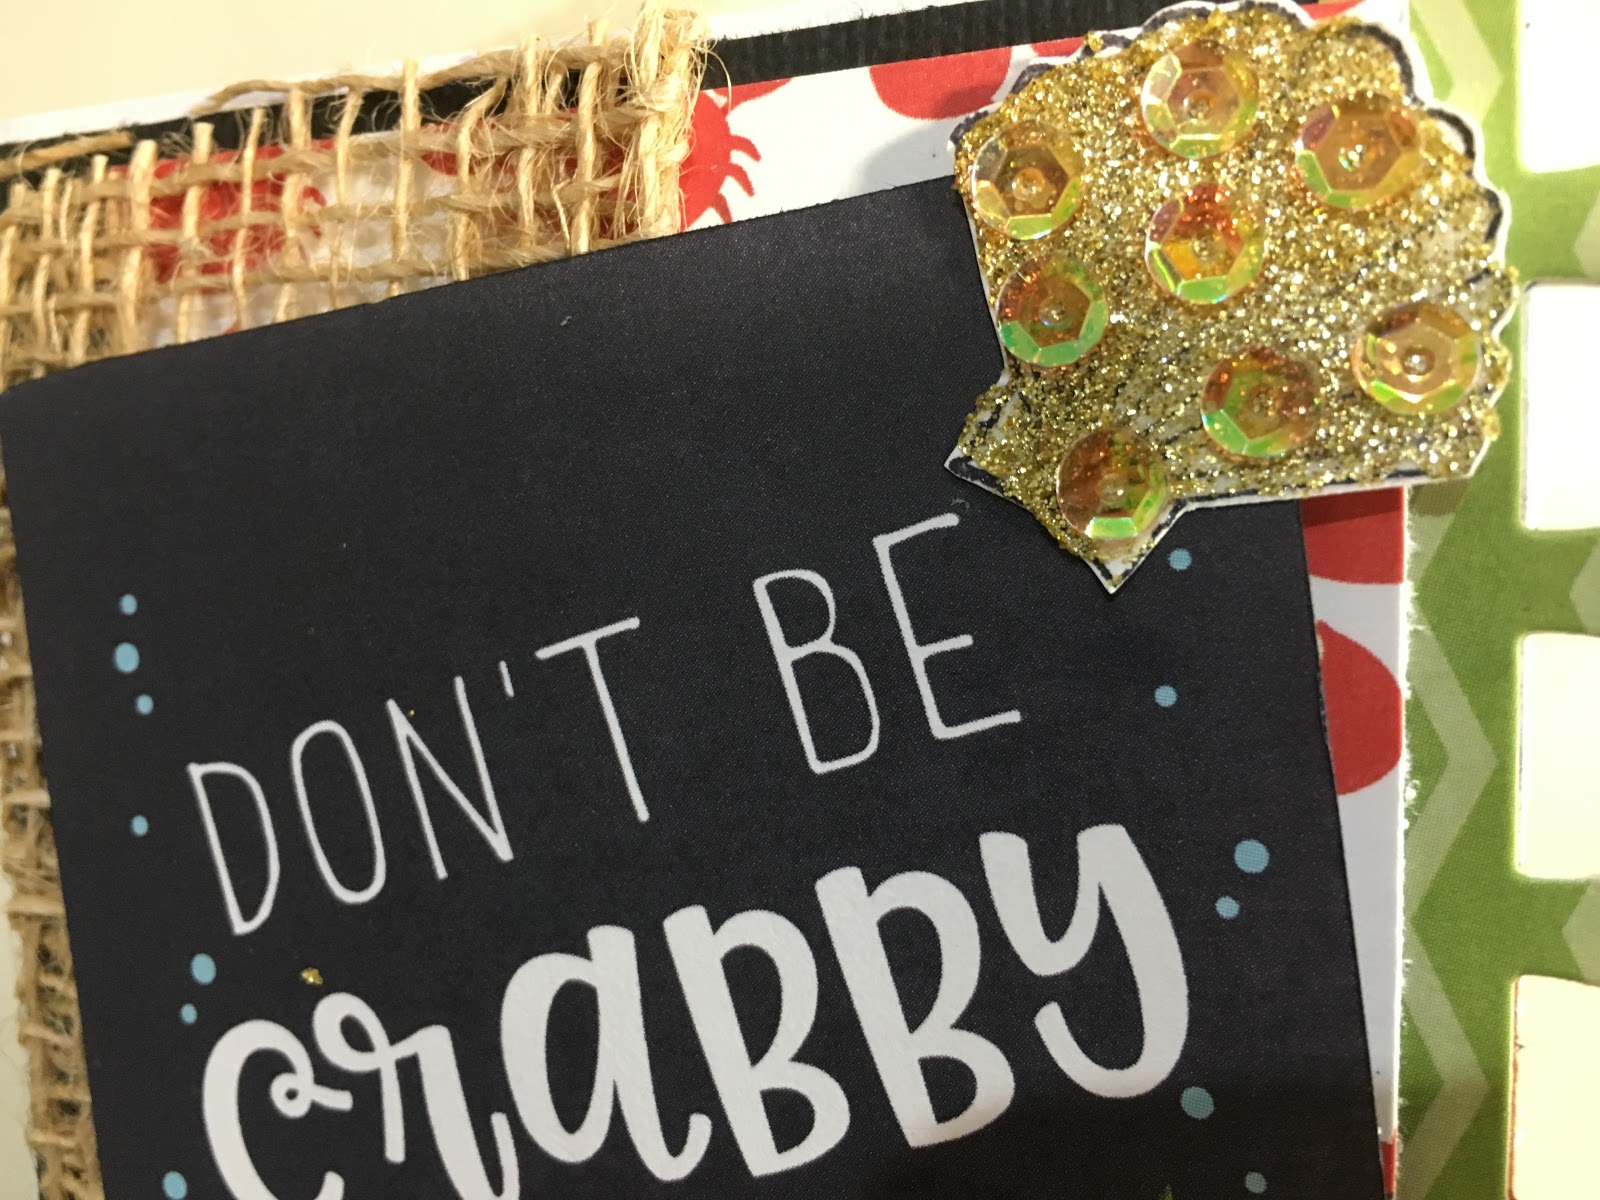
I also added an extra element to the front of this card which is the scalloped border.
This is a die from my stash from Kaisercraft called Card Creation- Scalloped Card Edges and I cut the front of my card 3/4" smaller and added this border to create interest.

It also acts a peep window for the inside of the card, which you can add something else to.
Here, I added that beautiful washi once again.


Then when you close the card, you can still see the washi peaking through the scalloped border in the front.
 |
| NB: I added this feature AFTER I had filmed so it's NOT in my process video. BLOG EXCLUSIVE :) |
Next, I stamped out some more seaweed and shells and created underwater elements with seed beads, glitter paste and sequins.

Check out the process video for how I made these HERE


Here is the entire card :)

Card 6:Wish you were here
This patterned paper FILLED me with fear!


This patterned paper FILLED me with fear!

SUBMARINES?
Yes Amira! Submarines.
I did a little Kon Mari session and I was finally inspired by the round submarine windows to make a shaker card!
I used my nested circle dies to create a round frame using thick silver card stock and I used the larger circle die to cut out the pale blue patterned paper with fish swimming in it and it picked up the darker fish swimming in the submarine background paper (perfect pairing really!).
I also cut out the acetate with the larger die and I used the nesting duo to cut out 2 foam frames which I adhered together with PVA glue so allow me to add the bulk of my shaker elements.
I used some of these glitter shards in the shaker mix!
Oh how I love this product!

You can see more of this process in my process video.
I attached these Doodlebug stickers into the shaker window and on the frame of the 'window" and finished off the card with a sentiment and some of the 'Green Curls' ribbon from the kit.

"Wish you were here, Under the Sea "

I ADORE this card!
I can't believe I was so scared to use that paper at the start!!
Take THAT Negative Nancy *LOL*
Card 7: You Octopi my heart
For this card, I used this paper "Starfish Happy"

I cut out a panel and adhered it to the card front and added a second orange panel (which is matted with black card stock) - 5 1/8" x 1 3/4".
I then used one of my large circle dies and cut out a big circle out of white card stock and then trimmed the edge to the left of the spine.
Do you remember this cute stamp and co-ordinating die set from the February Kit?

Cute Mr Octopus is back to 'Octopi our hearts' one more time.

Had to add the bow tie which I glittered up for some spiffy cuteness :)


I ADORE this card!!
Simple yet so effective.

Card 8: We wish we were fish
Once again, I used 'Aquatic Fun' as the background panel for this and this time I used my 1" circle die to cut three round panels into a white card stock that is 31/2" x 5 1/8".
I then used the "Ocean Friends" paper to fussy cut out the turtle, dolphin and the whale.


Once again, I used 'Aquatic Fun' as the background panel for this and this time I used my 1" circle die to cut three round panels into a white card stock that is 31/2" x 5 1/8".
I then used the "Ocean Friends" paper to fussy cut out the turtle, dolphin and the whale.

I popped these creatures around the holes I had created so that I could still add characters to a card even though the background paper is full of fish.
Here the turtle is popped up on foam tape.

Here the dolphin curves around the circle die cut out.

And here the whale fills in the white space nicely.

I love the simpleness of this card.


And I giggle at the sentiment here!
Even under the sea, some creatures wish to be others!
Thats life, eh!

Card 9: LAUGH, GIGGLE, RELAX, NAP
For this next card, I relapsed into my usual style of light colors.
I used blues, yellows and oranges as well as the remainder of a journaling card matted with black card stock.
I shaped the yellow and orange strips into fish tail banners for some interest.

I also added enamel dots of varying sizes and colors to add to the "bubble" background.
Next, I used the jelly fish from Border Strip and created this cluster here using the hessian -aka jute ribbon, from the kit.

He's SO CUTE!!!


Here is my final card:

Card 10: Sizzix Flip it Card- Best Wishes
For my last card, I used 'Deep Sea Fun' and 'Submarine Scene'.
I also pulled out a Sizzix Framelit Flip It Card from my stash.

It die cuts a scalloped edge base card (with score lines) and has a "flip it" feature that spins as the card opens and closes.
The front of the card has a left panel with a turtle scene on it:

Here is a closer look at the middle 'flip -it' feature:


I layered decreasing sizes scalloped die-cuts and circle die-cuts then a frame before attaching the dolphin element on with foam tape.
The card looks like this when you put it together:

Then when you flip it, the middle feature reveals the other side which I once again layered with scalloped and circle die cuts and attached a "Best Wishes" die cut.

I constructed a "belly band" feature around the inside of the card, attached it with hot glue and then added a DoodleBug sticker to hide the join.

And here are all 10 cards :)

Please check out my process video HERE
Thank you SO much for stopping by.
I hope you have found some inspiration here :)
xxAmira
Thank you SO much for stopping by.
I hope you have found some inspiration here :)
xxAmira
Comments
Post a Comment