Hi everyone,
After my last wallet tutorial, I felt the need to create yet another wallet-
this time a clutch wallet once again using the Marvel Comic Page Kit

I got the inspiration to make this clutch wallet from THIS DUCT TAPE TUTORIAL but modified it to use scrapbooking paper.
I was especially inspired by this Captain America paper- how amazing it would be to have a wallet that had this on the front!

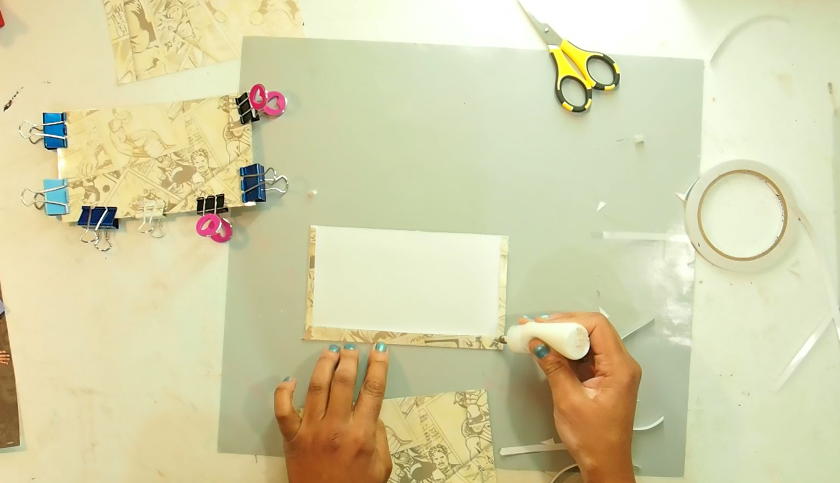
I started by cutting 5 panels @ 4" x 7"

These I sent through my laminator to make them sturdy.
Next, I cut :
- 4 strips of 4" x 1" (score @ o.5")
- 2 strips of 7" x 1" (core @ 0.5")

Attach the two smaller strips to the sides of one panel,
then attach the longer piece at the bottom.
Use double sided tape and PVA glue to attach the second panel on top to make a pocket.

Now repeat with the other 2 panels.
You should now have 2 pockets.

There is one more panel left over, keep that aside for use in a little while.
Now it's time to attach these 2 pockets together.
Lay your pockets so that both pockets are facing to the right.

Cut 1 strip of paper to 7"x 1", score @0.5"

I added double sided tape and then added the Marvel Washi to one one side for decoration.

Next, add double side tape close to but NOT ON either side of the score line on the spine

I also added PVA glue.

Attach each of the pockets, make sure once again that both pockets are facing the same direction (or you might want the pocket formation to face boards the inside- whatever you want- it's going to be your wallet).

At this stage, I held it close with bull dog clips to give it a moment to come together.
Next its time to make the card holders which I will be placing on the right panel.
Cut 3 comic papers to:
- 5" W (score @ 0.5" and 4.5") x 2.5" H (score @ 2")

Check your paper orientation.
Add double sided tape to the hinges.
I also added clear packing tape to ensure these card holders are more durable.

Next, attach your cardholders making sure the top card holder is low enough so that your cards do you not peek out of the wallet when they slot in.

You can choose to add clear packing tape here to hold your card holders in place. Make sure you tuck it into the pocket on the left and that you burnish nicely along the right edge.

Next, I wanted to create an area where I could put my photo ID spot I can flash it while it's still in my wallet.
Firstly, I decorated the left panel with that fabulous dark Marvel washi.

Next, I used a piece of clear bonded laminate (2.5"H x3.5" W) and attached double sided tape in a "C" formation.
I once again added some of that awesome white Marvel washi for decoration.
Then I flipped it over and added both double sided tape and PVA glue and stuck it down.

Now you can put any card in there and display it proudly.


Remember the 5th panel from that first step- it's time to use it now.
I did however bring in this Captain America panel which I wanted to be the outside of the wallet.

So I cut it down to 4" x 7" and backed it up with contrasting black paper and sent it through the laminator as well.

This is what the outside of the clutch wallet looks like .

We need to create a spine to attach that last panel.
Cut a piece of paper 7" x 1" (score @ 0.5").
I added washi tape again to the outside piece and I added clear tape too to shore it up.
Next, add double side tape close to but NOT ON either side of the score line on the spine.
I also added PVA glue.


Attach the pocket on the left hand side and the panel on the right and burnish well to get a good stick.
This black piece of laminated paper can now act as a dash board for you to stick reminders on or paper clip receipts and tickets to.

And here it is!
The clutch when open.

Close over the left side....

.. and close over the right side to reveal the beef cake Captain America!

Now for the closure!!
AsI said in my tutorial, I did not want to add buttons and ribbons as I felt it was not befitting the theme (LOL) so I went with the mighty and humble rubber band!!
It seemed so fitting!!!

And there you have it!!
2 DIY wallets made using the Marvel Comic Page Kit.

Aren't they fabulous!!

Check out the process tutorial HERE
Let me know what you think!!
Would you make one?
xxAmira
Comments
Post a Comment